
Add & Delete Users on CentOS, Debian, Ubuntu & Windows

How to Add and Delete Users on Debian
Add and delete users on CentOS, Debian, Ubuntu, and Windows with ease using the following simple commands and steps. This guide will walk you through the entire process for creating and removing users on these popular operating systems.
Add and Delete Users on CentOS, Debian, Ubuntu & Windows
Managing user accounts is a key task for system administrators on any operating system. Whether you are working with CentOS, Debian, Ubuntu, or Windows, understanding how to add and delete users is critical for keeping systems secure and properly maintained. In this guide, we’ll go through step-by-step instructions on how to manage user accounts on each of these platforms.
Add New User on Linux (CentOS, Debian, Ubuntu)
The commanduseraddis the basic tool for adding new users to Linux systems. You can customize the user’s home directory, shell, and even assign them specific group memberships. For example, useuseradd -m -s /bin/bash lilyto create a new user named “lily” with a home directory and bash shell.
Delete User on Linux
If you no longer need a user account, theuserdelcommand can be used to remove a user. Use the-roption to remove the user’s home directory as well. It’s also important to ensure that no critical files are owned by that user before deletion.
CentOS, Debian, Ubuntu
1. Add New User
Use the command useradd for adding users in CentOS, Debian, Ubuntu.
# useradd lily
Set a password for user “lily” to active it. Use the following command to set new password.
# passwd lily
Note: Default location of home directory of user lily will be /home/lily
2. Delete User from System
Use the following command to delete
# userdel lily
To remove including the home directory use the following command
# userdel -r lily
Windows
Windows User Management
Windows provides a graphical interface for adding and deleting users, but you can also use command-line tools like
net userfor this task. For example,net user lily /addcreates a new user named “lily,” andnet user lily /deleteremoves it from the system.
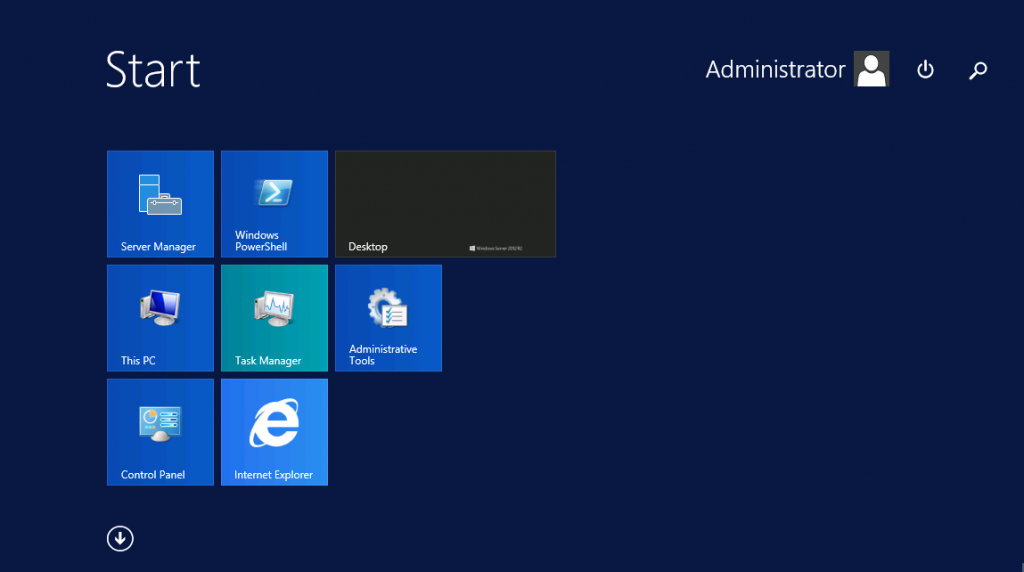
1. Open Start Menu and click on “Administrative Tools”.
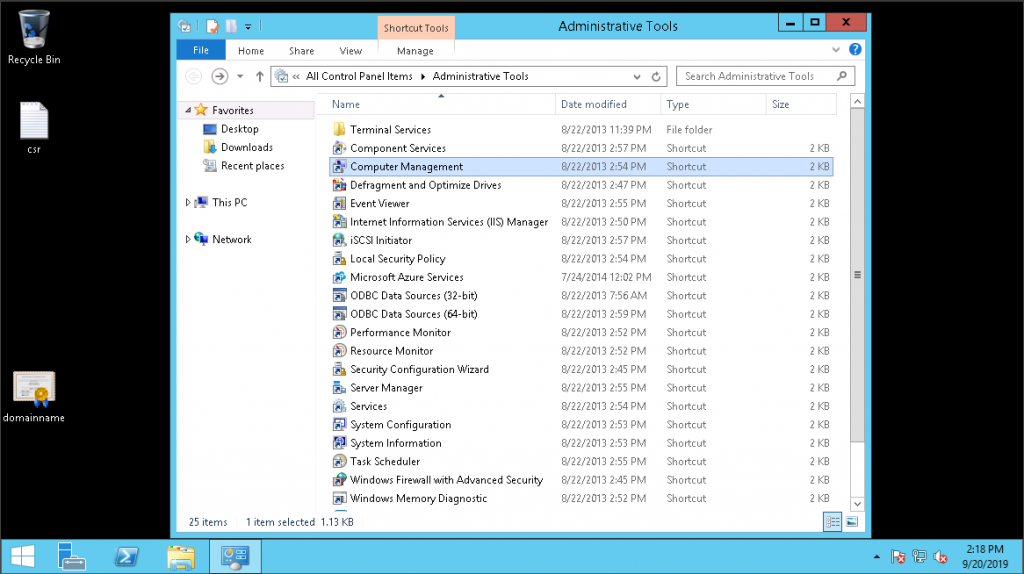
2. Open Computer Management
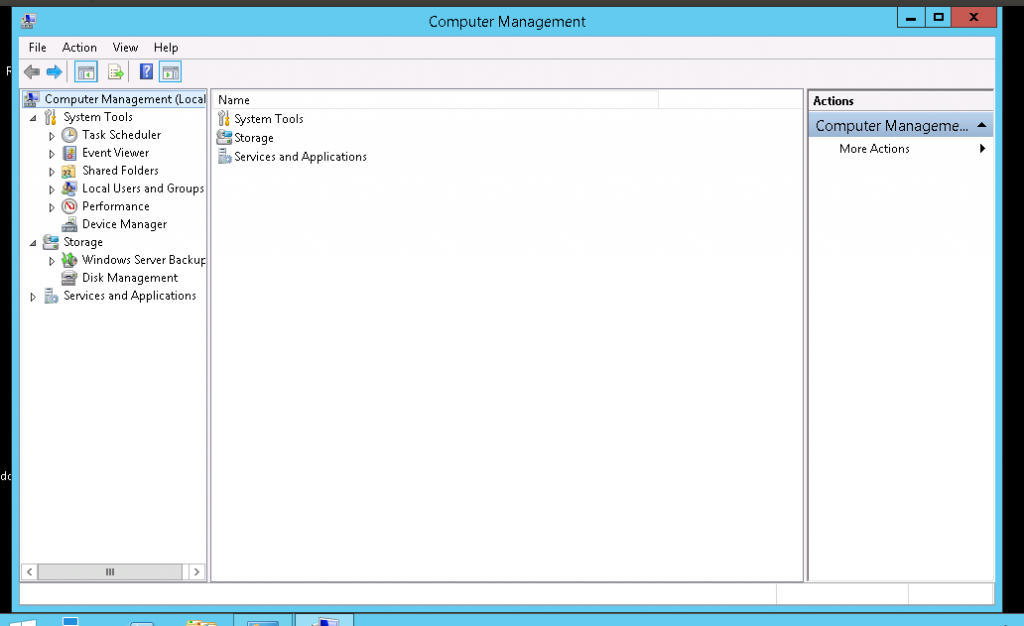
3. Click on Local Users and Groups
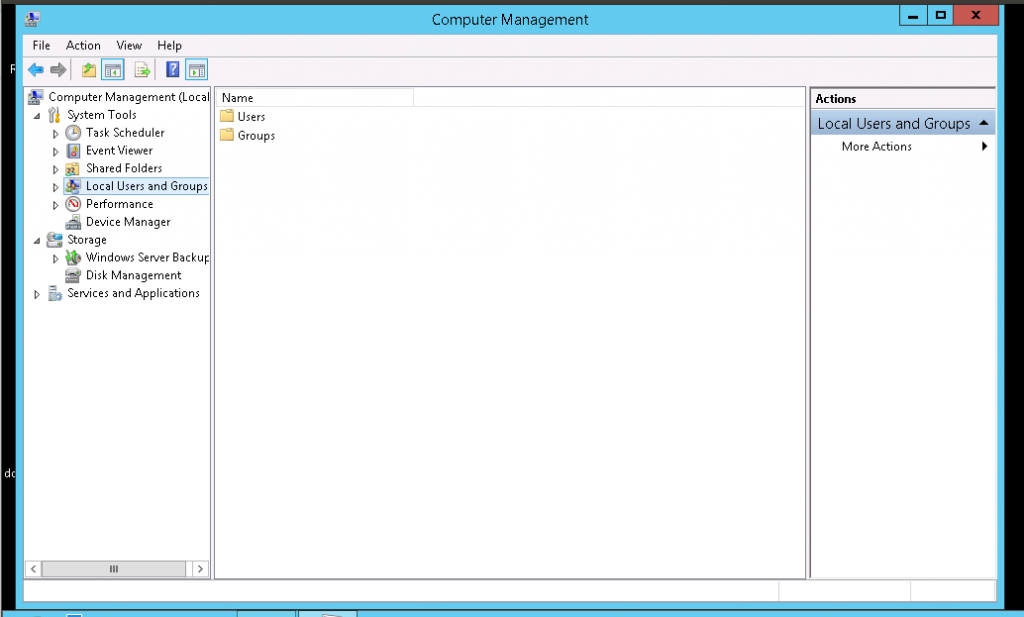
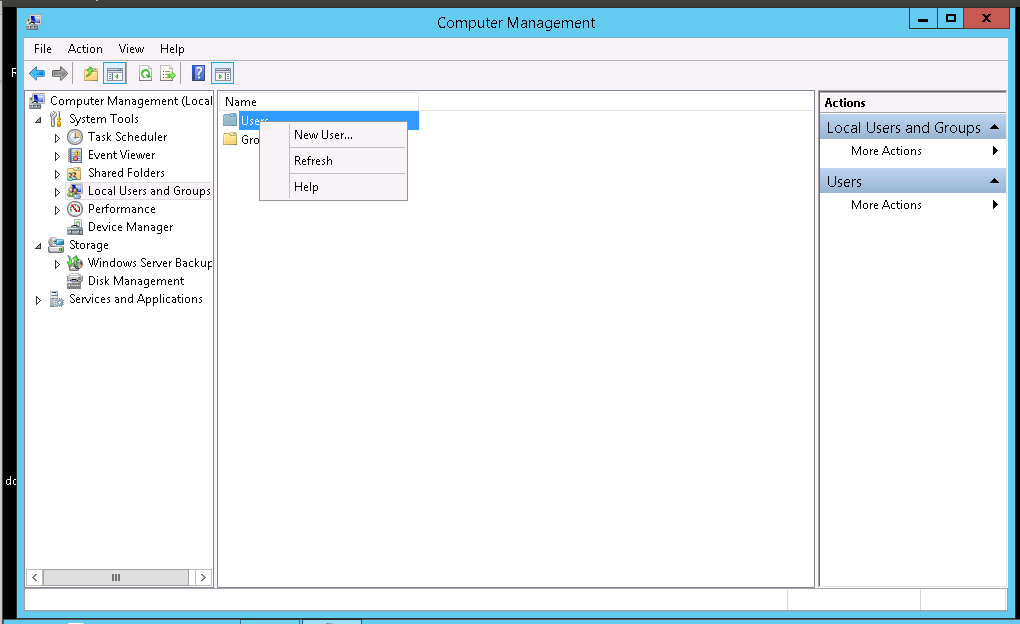
4. Then you will see a page showing folders “Users” and “Groups”.
5. Right click on Users and select new user
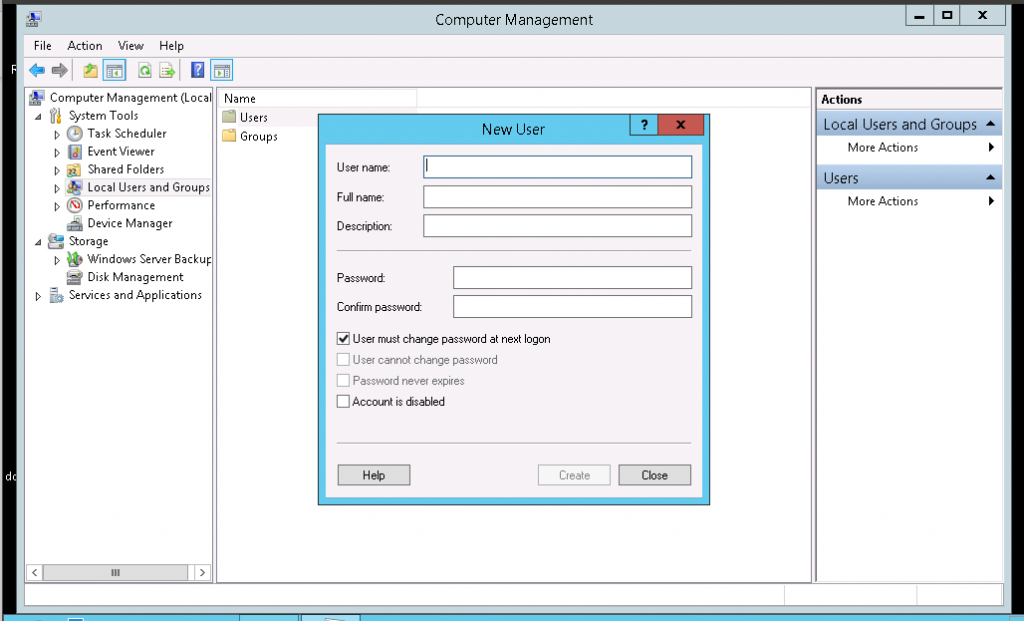
6.Type the appropriate information in the dialog box and click Close
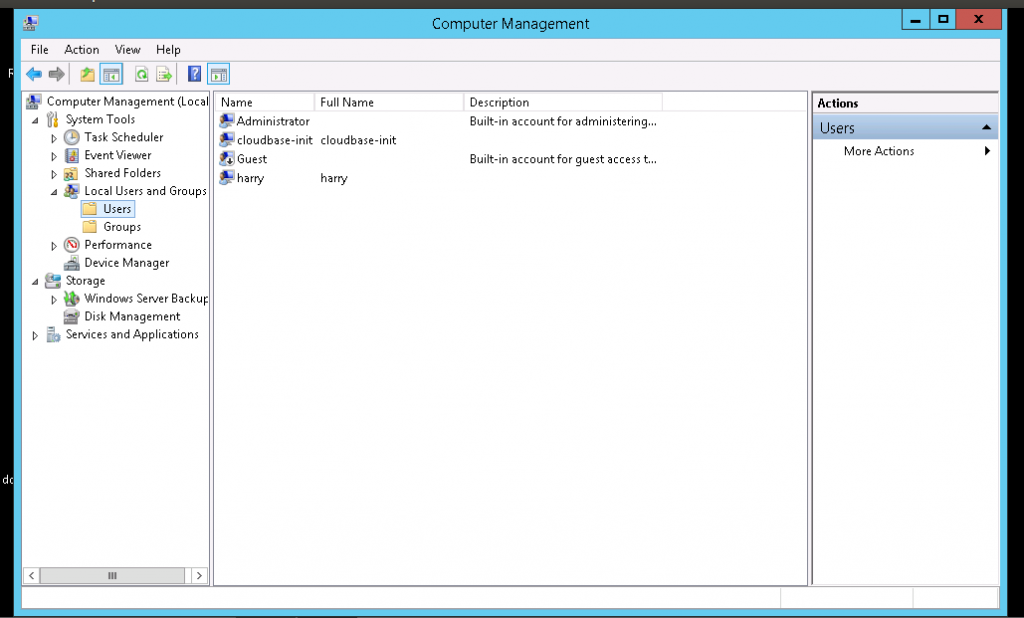
7. Double click on the Users menu. Then you will see list of users.
Real-World Use Cases and Troubleshooting
Let’s look at a scenario where you need to add a user for a temporary project, then remove the account once the project is completed. In such a case, you might create the user with limited permissions (to avoid security risks) and later delete the account with the userdel -r command to ensure all files are cleared.
In case you face any issues like “user cannot be deleted because they are currently logged in,” you can check for active sessions using the who or w command in Linux, or use Task Mana
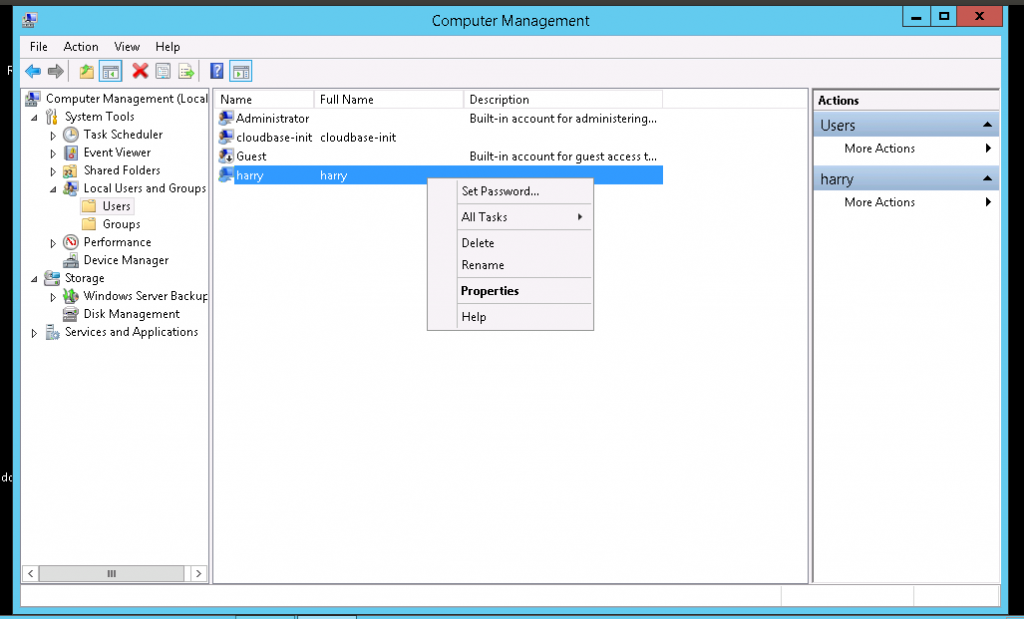
8. To delete a user right click on the user’s name and select delete.
In conclusion, adding and deleting users is an essential part of system administration. Linux offers a wide range of user management commands, and Windows provides a GUI-based method for users who prefer not to use the command line. Make sure to use strong passwords, and regularly review and manage user accounts to keep your system secure.In summary, adding and deleting users is a simple process, but it’s important to handle user accounts carefully to ensure system security. Always remember to set strong passwords and keep your user list clean by deleting unnecessary accounts.