Install SSL Certificates in Windows IIS
Install SSL in Windows IIS
SSL is the most widely used security protocol and it protects your sensitive information as it travels across Internet. Using SSL is essential for protecting your website, even if it does not handle sensitive data such as credit cards, personal data, and contact information.
The easiest way to secure your website is by using an SSL certificate and HTTPS. SSL installation involves three general steps, which are as below:
- Generating a Certificate Signing Request (CSR)
- Purchase of SSL certificate from an SSL vendor
- Installation of SSL certificate in the server
The below steps outline the process of CSR generation and SSL installation with IIS on Windows servers.
Creating CSR in IIS:
1. Click on Start >> Administrative Tools >> Internet Information Services (IIS) Manager
2. In the Connections pane, click on the server name.
3. In the center pane, double click on Server Certificates under IIS section
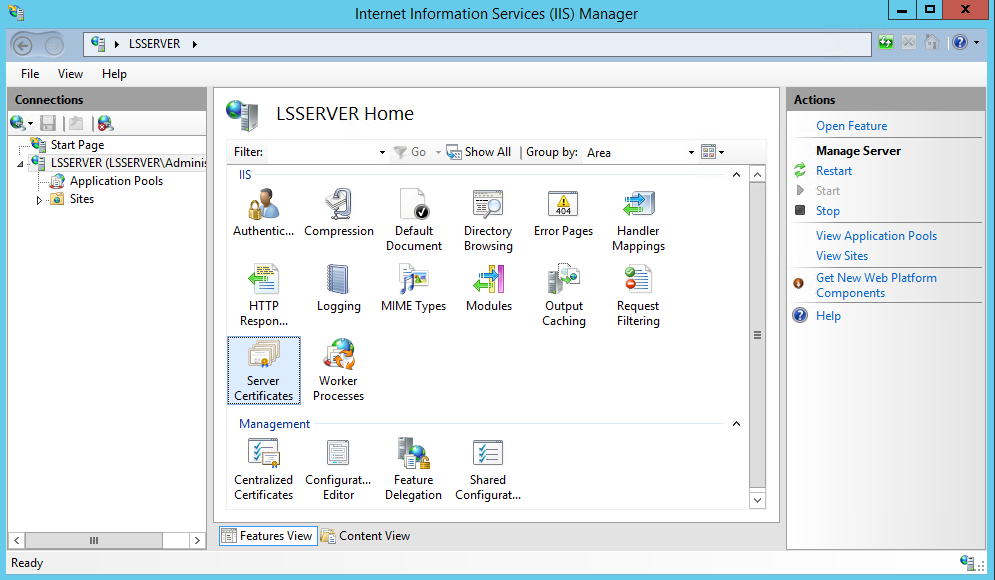
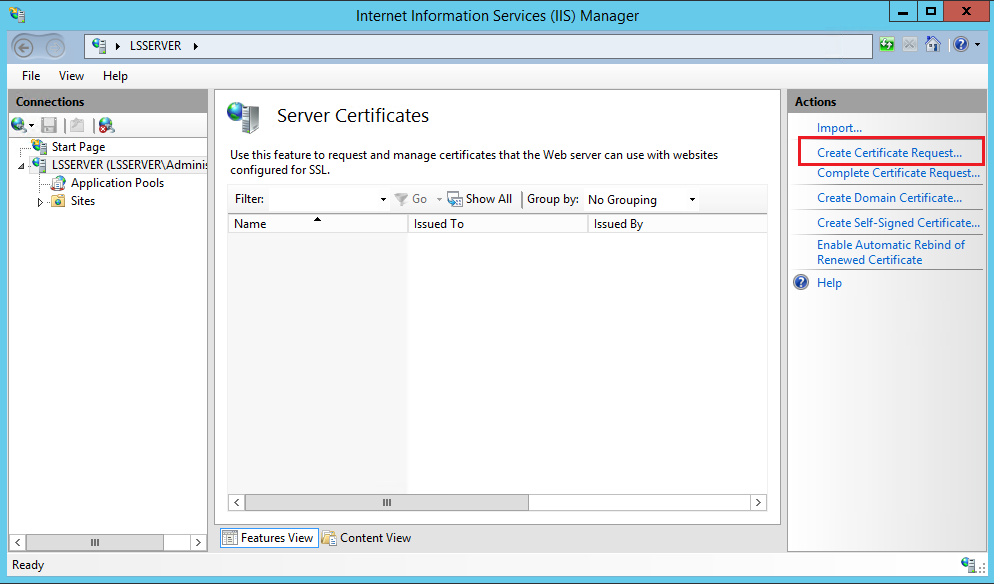
4. In the Actions menu in the right pane, click on Create Certificate Request.
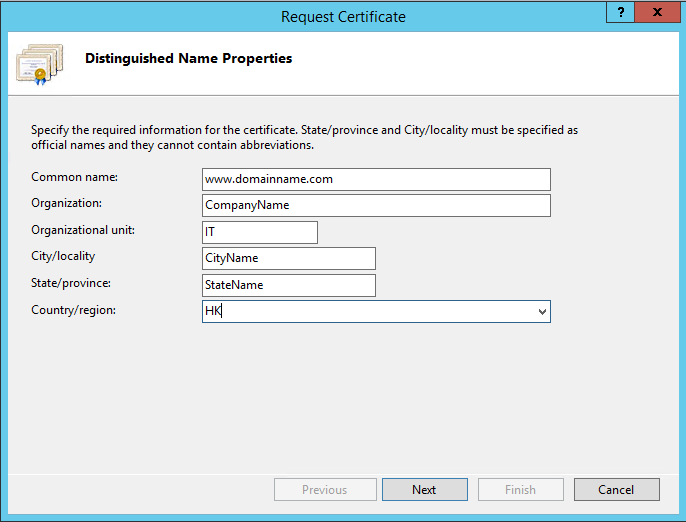
5. In the Request Certificate window, provide your information in the Distinguished Name Properties page and then click Next.
- Common name: Your fully qualified domain/website name
- Organization: Your company’s legally registered name
- Organizational unit: The name of your department within the organization.
- City/locality: The city where your company is located.
- State/Province: The state/province where your company is located.
- Country/Region: The country/region where your company is located. You can use the drop-down list to select your country.
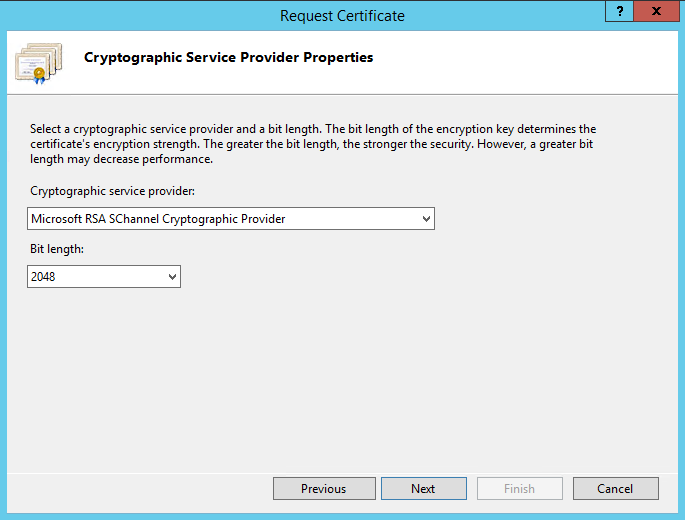
6. On the Cryptographic Service Provider Properties page, select Microsoft RSA SChannel Cryptographic Provider as the Cryptographic service provider and 2048 as the Bit length and then click Next.
7. On the File Name page, under Specify a file name for the certificate request, click the![]() button to specify a file name and save location for your CSR.
button to specify a file name and save location for your CSR.
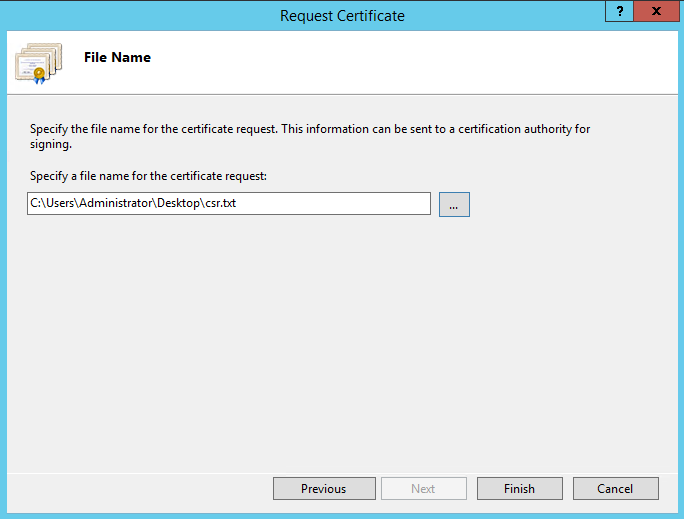
8. Click on Finish once done.
9. The generated CSR can then be used to order the SSL certificate from a third-party SSL provider.
Installing and Configuring the SSL Certificate in IIS
Once the SSL provider has issued and provided the certificate, you need to install and configure the SSL certificate in the server where the CSR was generated. The below steps can be followed for this purpose.
Installing the SSL certificate
1. Save the SSL certificate .cer file that you have received from the SSL provider in the server where you generated the CSR.
2. Click on Start >> Administrative Tools >> Internet Information Services (IIS) Manager
3. In the Connections pane, click on the server name.
4. In the center pane, double click on Server Certificates under IIS section
5. Click on Complete Certificate Request in the Actions menu (right pane).
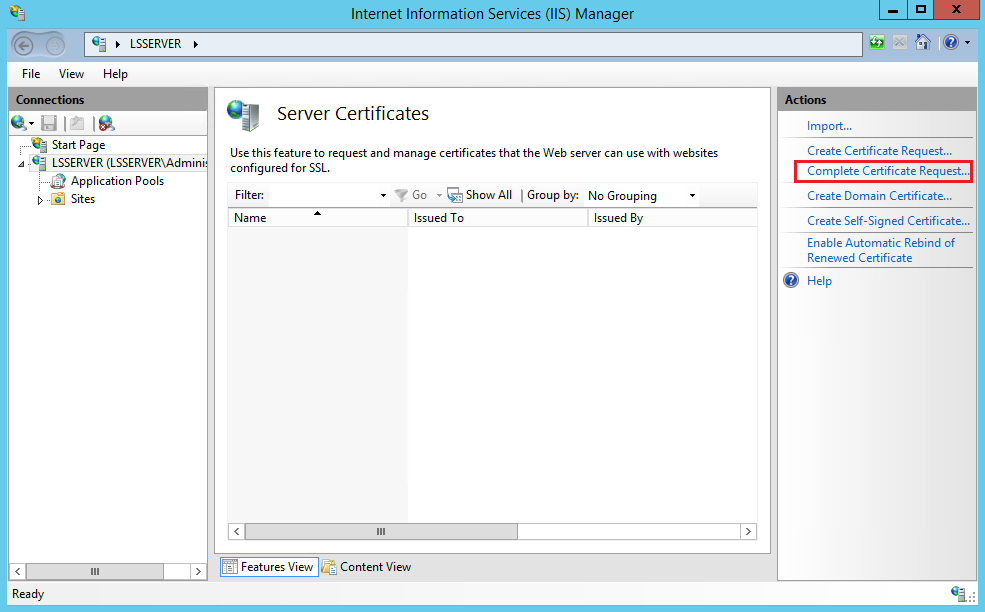
6. In the Complete Certificate Request window, on the Specify Certificate Authority Response page, provide the below information:
- File name containing the certificate authority’s response: Click the button and locate the .cer SSL certificate file that you have saved in the server.
- Friendly name: A name used to identify the certificate.
- Select a certificate store for the new certificate: Select Personal, in the drop-down list
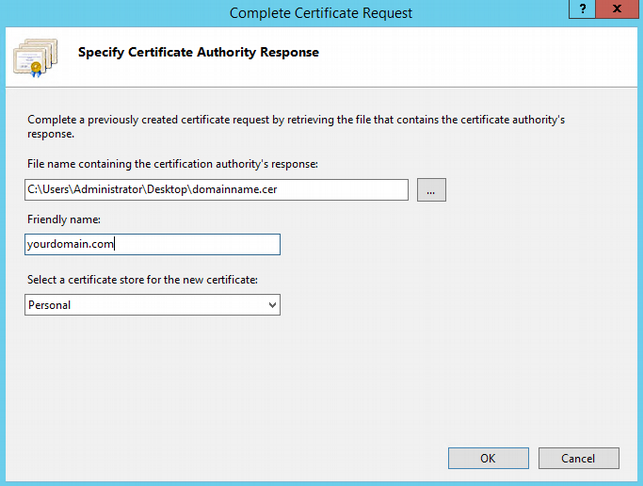
7. Click OK to install the certificate.
Now, that the SSL certificate has been installed in the server, you would need to configure your website to use it.
Configuring website to use the installed SSL certificate
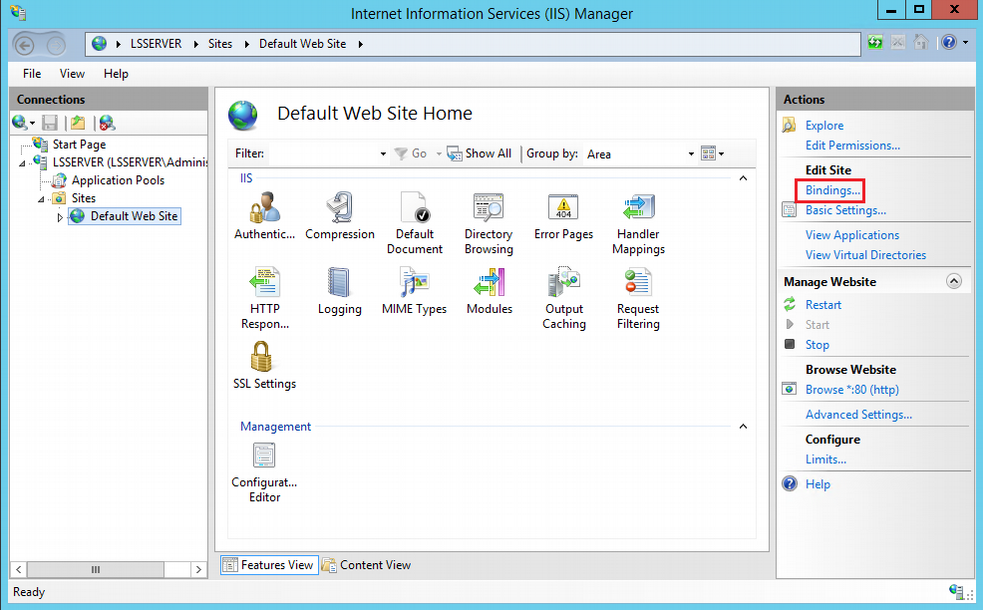
1. In IIS Manager, in the Connections pane, expand the name of the server, expand Sites and then click on the website you want to secure using the SSL certificate.
2. In the Actions menu, click Bindings.
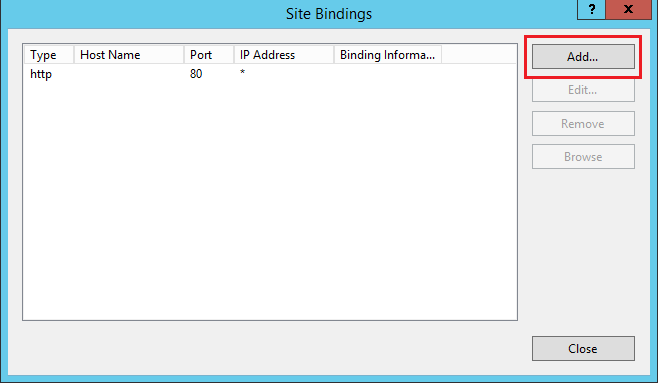
3. In the Site Bindings window, click on Add.
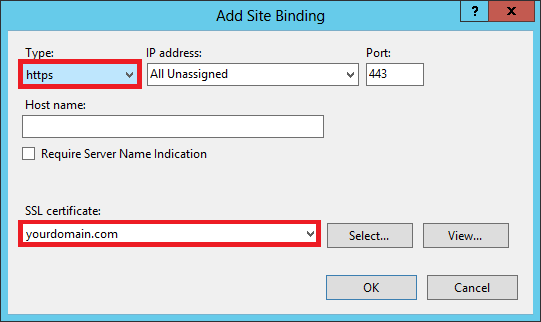
4. In the Add Site Binding window, specify the below settings and then click OK.
- Type: Select https from the drop-down list
- IP address: From the drop-down list, select the IP address of the website or select All Unassigned.
- Port: Type 443 (SSL uses port 443 to secure traffic.)
- SSL certificate: From the drop-down list, select the installed SSL certificate.
5. Your website is now configured to use the newly installed SSL certificate. The website can now be securely accessed using the URL https://yourdomain.com

