How to Install POSTFIX on CentOS, Debian & Ubuntu?

Postfix is one of the fast, secure and open source mail transfer agent which is used to relay mails locally and to remote network.
Postfix installation on CentOS, Debian, and Ubuntu is essential for setting up a secure and reliable mail server. Postfix is one of the most popular open-source mail transfer agents (MTAs), used to route and deliver email efficiently. Unlike other MTAs, Postfix is known for its security and performance features, making it ideal for both personal and enterprise-level mail systems. In this guide, we will walk you through a detailed process for installing and configuring Postfix on CentOS, Debian, and Ubuntu systems, with each section tailored to the specific needs of these Linux distributions.
The below guide will explain how to install Postfix specifically on a different OS distribution.
Installation on CentOS7
By default, CentOS7 comes with pre-installed Sendmail MTA. So first we may need to remove the default MTA. Sendmail will not be installed by default in minimal installation, so we can skip this step if there is no sendmail installed.
CentOS 7 is a popular choice for enterprise servers. However, it often comes pre-installed with Sendmail, the default MTA, which you might want to replace with Postfix. Follow these steps to ensure a smooth Postfix installation on CentOS 7.Step 1: Verify and Remove the Default MTA (Sendmail)
Before installing Postfix, we must ensure that no other mail transfer agents are running on the system. You can check if Sendmail is installed by running:
bashCopy coderpm -qa | grep sendmail
If it’s installed, remove it by executing:
bashCopy codeyum remove sendmail
This step ensures that there are no conflicts with the existing MTA when installing Postfix.
Step 2: Install Postfix
Now, install Postfix by running the following command:
bashCopy codeyum install postfix
During the installation process, you might be asked to confirm the installation. Once it is complete, proceed to configure Postfix as described below.
Step 3: Configure Postfix
Postfix requires specific configurations to work properly. Open the main configuration file using a text editor:
bashCopy codevi /etc/postfix/main.cf
You’ll need to modify several key settings, such as myhostname, mydomain, and mynetworks. For example:
bashCopy codemyhostname = mail.server.com
mydomain = yourdomain.com
Save the file and exit the editor.
Step 4: Restart the Postfix Service
Finally, enable and restart Postfix to apply the new configurations:
bashCopy codesystemctl enable postfix
systemctl restart postfix
With Postfix successfully installed and configured, you are ready to start using it as your mail server on CentOS.
Expanded Installation on Ubuntu/Debian:
For Postfix installation on Ubuntu or Debian, the process is fairly straightforward since Postfix is available in the default repositories.
Step 1: Install Postfix
To begin the installation process, run the following command:
bashCopy codesudo apt-get install postfix
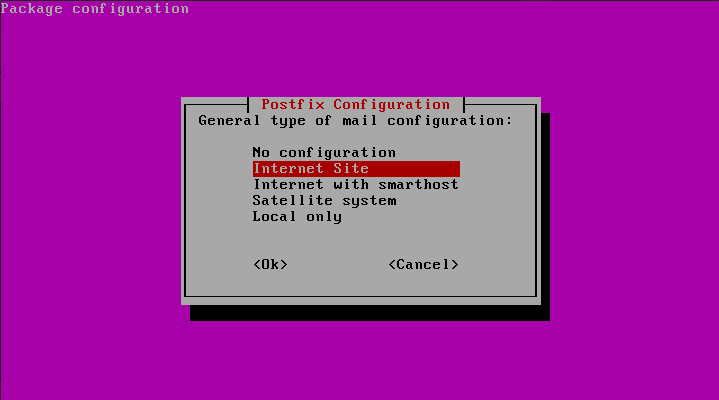
During the installation, you will be prompted to choose the type of mail configuration you want. For most systems, selecting “Internet Site” will be appropriate.
Step 2: Configure Postfix
Once installed, you’ll need to configure Postfix to suit your needs. Open the configuration file:
bashCopy codevi /etc/postfix/main.cf
Again, modify important settings such as myhostname, mydomain, and inet_interfaces. Example:
bashCopy codemyhostname = mail.server.com
mydomain = yourdomain.com
After configuring Postfix, save and exit the editor.
Step 3: Restart the Postfix Service
Finally, restart Postfix to apply the changes:
bashCopy codesudo systemctl restart postfix
Postfix will now be installed and ready to handle email on your Ubuntu or Debian system.
Additional Configurations and Security Best Practices:
Once Postfix installation is complete, there are a few additional configurations and security best practices you should consider:
Firewall Settings: Ensure that your server’s firewall allows traffic on the necessary ports (e.g., port 25 for SMTP). If you’re using firewalld, you can open the port with:bashCopy codefirewall-cmd --zone=public --add-port=25/tcp --permanent firewall-cmd --reload
Configuring Mailbox Storage: By default, Postfix stores mail in a file system. For better performance, consider using Maildir format for storing messages. To configure this, modify the home_mailbox setting:bashCopy codehome_mailbox = Maildir/
Securing Postfix: Implement security measures such as enabling TLS (Transport Layer Security) to encrypt email transmissions and prevent unauthorized access. This can be done by editing the main.cf file and enabling the following:bashCopy codesmtpd_tls_security_level = may smtpd_tls_cert_file = /etc/ssl/certs/mail.server.com.crt smtpd_tls_key_file = /etc/ssl/private/mail.server.com.key
1. Verify and Remove the default MTA (Sendmail)
# rpm -qa | grep sendmail
# yum remove sendmail
2. Install postfix.
# yum install postfix
3. Once the Postfix has been installed, we need to configure the postfix.
#vi /etc/postfix/main.cf
Then you may need to configure the below settings.
## Uncomment and set your mail server FQDN ##
myhostname = mail.server.com
## Uncomment and Set domain name ##
mydomain = yourdomain.com
## Uncomment ##
myorigin = $mydomain
## Uncomment and Set ipv4 ##
inet_interfaces = all
## UnComment ##
mydestination = $myhostname, localhost, $mydomain
## Uncomment and add IP range ##
mynetworks = 127.0.0.0/8, /32
## Uncomment ##
relay_domains = $mydestination
## Uncomment ##
home_mailbox = Maildir/
4. Restart Postfix Service
# systemctl enable postfix
# systemctl restart postfix
Installation on Ubuntu/Debian
Postfix packages are available under default
repositories of Ubuntu operating systems.
To install Postfix
SMTP server on your Ubuntu system please follow the steps:
1. Install Postfix
# sudo apt-get install postfix
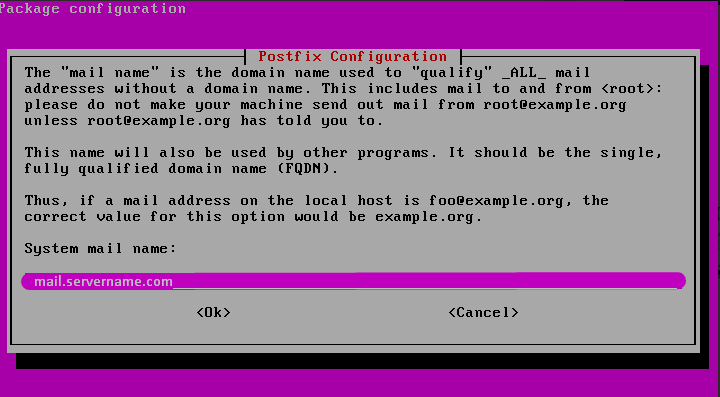
The installation process will ask you for some inputs like below.


2. Once the Postfix has been installed, we need to configure the postfix.
#vi /etc/postfix/main.cf
Then you may need to configure the below settings.
## Uncomment and set your mail server FQDN ##
myhostname = mail.server.com
## Uncomment and Set domain name ##
mydomain = yourdomain.com
## Uncomment ##
myorigin = $mydomain
## Uncomment and Set ipv4 ##
inet_interfaces = all
## UnComment ##
mydestination = $myhostname, localhost, $mydomain
## Uncomment and add IP range ##
mynetworks = 127.0.0.0/8, /32
## Uncomment ##
relay_domains = $mydestination
## Uncomment ##
home_mailbox = Maildir/
4. Restart Postfix Service
# sudo service postfix restart
Postfix installation on CentOS, Debian, and Ubuntu systems is a straightforward process, but proper configuration is key to ensuring reliable and secure mail handling. By following the steps outlined above, you can have Postfix up and running on your server in no time. Always remember to test your configuration and ensure that your server is properly secured against unauthorized access.
